Chimney installed and fire alight!
Saturday, 13 December 2014
6th December
A man cutting a hole through the roof.
Build it and mess will come......
You can see the water-heater in position here.
Build it and mess will come......
You can see the water-heater in position here.
Monday, 10 November 2014
November 8th - decisions made......
decisions ...... 'off-grid' or not.... finally sorted and well underway

Mini sink installed with worktop made of spare floorboard.
Loo sink
- Water - OFF-grid. Supplied to sinks in loo and 'kitchen' from an external water tank using a 12v DC pump.
- Hot water - 240V heater under sink so if we move hut away from mains we'll wash in cold water
- Grey waste OFF-grid. Bucket and chuck-it
- Toilet OFF-grid. Cassette camping toilet
- Lights OFF-grid. 12 LEDs supplied by 12v battery (with 240V trickle charger)
- Power. 240V sockets for power and/or extra lights.

Mini sink installed with worktop made of spare floorboard.
Loo sink
Wednesday, 20 August 2014
July and August 2014 MUCH painting
All inside primed and painted before the floor laid.
Outside primed and painted.
Hindsight is a wonderful thing.
1 Paint the wavy bargeboards BEFORE they are fitted.
2 Paint the curved roof overhangs BEFORE fitting the last few oak boards
3 Paint the sides of the window/door frames BEFORE cladding past them.
Would have saved much time and cursing. (Although we were fighting wet and windy weather at the time otherwise we might have thought it through)
Tuesday, 22 July 2014
22nd July 2014
240v connection made,
loo wall up, hand basin attached but not plumbed in.
inside primed and first coat on.
loo wall - decided to put the door at an angle - more framing to build. Needed more cladding from Blackdown.
Wiring going in and a much reduced wood pile!
Tuesday, 17 June 2014
16th June
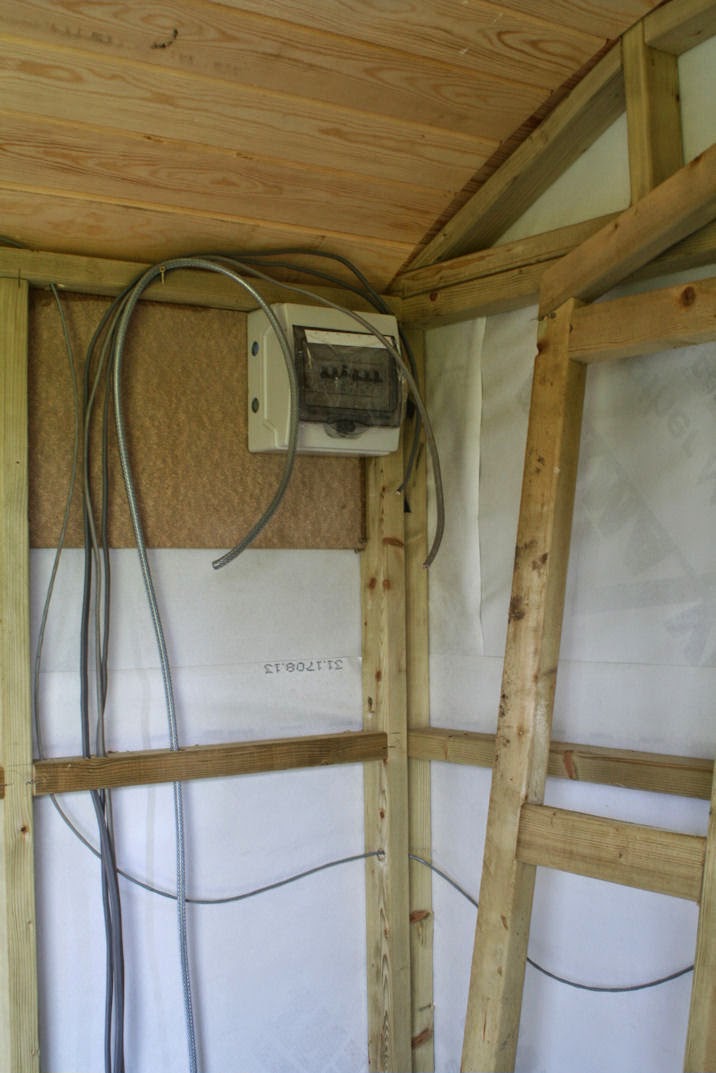
A week of 'after work' and a weekend sawing wood sees all the wiring in and 3 sides of panelling done - beginning to look finished.
We have decide that the loo wall will go in after the floor and panelling so it can come out easily if we need to change things.
We have decide that the loo wall will go in after the floor and panelling so it can come out easily if we need to change things.
Wednesday, 11 June 2014
11 June
Dave away so a week with no progress. Now he's back - wiring almost all in place, distribution box in, plugs/lights etc ordered. Started internal insulation and cladding.
A man and his hut.
A man and his hut.
Monday, 26 May 2014
26th May - A Very Wet Day
No photos this time. More discussions about internal layout, wiring loo walls etc - lots of use of the Internet. Did get the internal bracing off and out though. Most in one piece including the long wall brace through the end window - saved for another project.
Trestles and planking can go back to the hirer now - rest of outside work possible from ladders.
Trestles and planking can go back to the hirer now - rest of outside work possible from ladders.
Sunday, 25 May 2014
24th and 25th May - The last Clad

Front now complete. Barge boards fitted after cladding complete. ( Noticed on the Video too late that the jig saw was set at an angle so that the drift of the underside due to blade bend is compensated for - the fit is fine, but would have been even better if noticed earlier).
Was waiting for the primer/undercoat of the roof underside to be done and trying to minimise the times the trestles needed moving.
Tarpualings all folded up so much quieter when it blows.
Only the fascias, some painting and the corner pieces bottoms to trim back/plugging screw holes and the outside will be done. Used longer screws than those suppied to help pull them in tight. Bit of trimming of the bottom boards requied to allow the corners fit well.
Had to do same on many of the boards that were fitted around windows and doors - the board top and or bottoms are up to to 3-5 mm thicker than the 20mm setting distance allowed for. Result still looks good - used knife blade rather than pencil to mark edge of cut needed so no pencil marks. Depth removed only where required at bottom of new board by guess work on basis that letting water fall down was better than having a lot of micro ponds.
Thursday, 22 May 2014
21st May - Still Cladding after all these years
Another evening after work sees the 'blunt' end finished. Really pretty!
Rain forecast but only 2 sides to sheet now!
Rain forecast but only 2 sides to sheet now!
Wednesday, 21 May 2014
19th and 20th May - Still Cladding
About 4 hours in total after work - cladding on a short side up to the top of the window. Dave stopped before he got to the curved cutting!
Much discussion and planning for loo and woodburner, MOSTLY resolved.
Much discussion and planning for loo and woodburner, MOSTLY resolved.
Sunday, 18 May 2014
18th May - cladding
Yes it can be done single handed - sky hooks Mk 2. Partial pre-drilling the end holes using a 1.5mm drill improves the chances of getting the end pins in first time ( 1mm is fine but break too many). Only the last board needed two sets of hands.
One hook at each end - screw close up to the roof as the anchor. Remove once ends are pinned but before the rest go in!
Nearly there only last board to fit after priming the underside of the roof.
One hook at each end - screw close up to the roof as the anchor. Remove once ends are pinned but before the rest go in!
Nearly there only last board to fit after priming the underside of the roof.
17th May - doors and windows
Had to take doors out to fit frame - too heavy with pre-glazed doors. Will fit later and then square up so the doors fit/look OK.
Room with a view - plenty of Silicone applied including to the manufacturing holes and screw heads on the top rails - don't want any ponds forming.
The start of a long clad.
Room with a view - plenty of Silicone applied including to the manufacturing holes and screw heads on the top rails - don't want any ponds forming.
The start of a long clad.
Friday, 16 May 2014
16th May - membrane
15th May - roof finished
A birthday treat, DJD has
2 days off to work on the hut in the sunshine!
All the insulation cut and fitted in the roof (another use for the breadknife)
Membrane on and then the sheets.
These took quite a bit of fiddling to get the overhang equal on both ends.
It would have helped to have the trestles/boards a bit higher!!!

Much tea was drunk!
Then he marked up and cut one of the wavy-edge boards before a pint at the pub.
2 days off to work on the hut in the sunshine!
All the insulation cut and fitted in the roof (another use for the breadknife)
These took quite a bit of fiddling to get the overhang equal on both ends.
It would have helped to have the trestles/boards a bit higher!!!

Much tea was drunk!
Then he marked up and cut one of the wavy-edge boards before a pint at the pub.
Monday, 12 May 2014
Saturday, 10 May 2014
10 May - Still the Roof
Minor problem resolved by Will 09:30.
Base propped at front and re-levelled by late morning.
Nice showery day so much time spent erecting and taking down tarpaulins.
But got the roof frames screwed down by mid afternoon. A tempory brace to hold out the side walls at the right width in the middle was a huge help - then everything seemed to fall into place.
One side done with strings on the tarpaulins eased off so enough height could be gained to get my head and a battery drill in to do the hard work - tipping it down at the time.
Got about 1/3 of the roof lining done before the boss called time to cover everything up for the night.
You can NEVER have too m,any G-clamps.
[Note from "the boss" given the weather maybe we should have looked at the price of a rigid/scaffolding framed roof]
Now appreciating a pint of Doom.
9th May - Roof frames in place
Needed three bodies so Father-Son bonding over putting up the roof frames!
Then we found a problem to resolve so tarps back on (the worst bit!) and email to George.
Then we found a problem to resolve so tarps back on (the worst bit!) and email to George.
Thursday, 8 May 2014
Day 3 - 8 May
In the rain after work, under the tarpaulin - squared up walls using tile batten as braces and checked diagonals . About 1.5 hours.
I (Deb) also got to spend a happy hour priming the BACK of the roof boards. Weather doesn't look great for weekend and HE SAYS they may get wet.
Hut day +2
An hour to level the chassis to Dave's satisfaction (!)
Then an hour to put up all 4 walls.
Hut Day +1
Several hours spent unpacking the parcel and storing stuff in the dry.
The only problem was that the doors were a 4-man lift - had to call for reinforcements, and drink more tea.
The only problem was that the doors were a 4-man lift - had to call for reinforcements, and drink more tea.
Hut day
HUT DAY May 3rd 2014
Better than lego or airfix - the hut arrives.
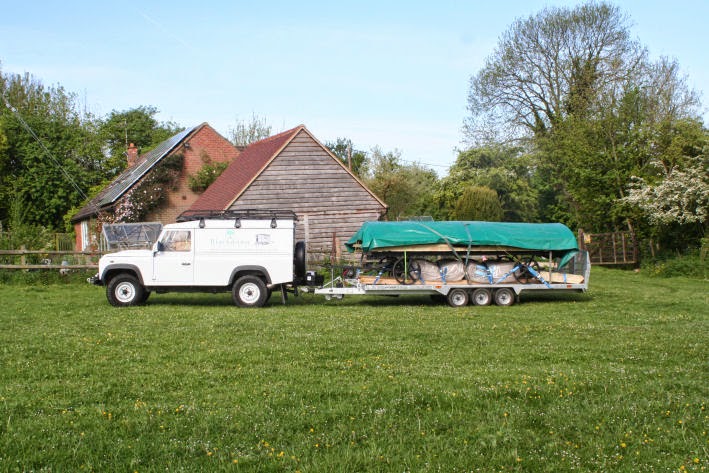
An early arrival caused its own minor problems: the ground was hard but the wet grass meant that the landie couldn't quite get it all the way into position - still, the winch did the rest.
Better than lego or airfix - the hut arrives.
An early arrival caused its own minor problems: the ground was hard but the wet grass meant that the landie couldn't quite get it all the way into position - still, the winch did the rest.
Subscribe to:
Comments (Atom)


